mongooseでlike検索
検索などでsqlのlike文的なのを使いたい時があると思います。
object.find( { $or:[
    {a: new RegExp( ".*"+query+".*")},
    {b: new RegExp( ".*"+query+".*")},
    {c: new RegExp( ".*"+query+".*")}
    ] } function(err, docs){
        if(err)console.log(err);
        res.json(docs);
    });

/*select * from object where a like %query%
                          or b like %query%
                          or c like %query%;*/
これでok
androidとnodeの連携
androidでDB使いたいなー、他の機と通信したいなーなんてことあると思います。
そこで、android と node の連携のサンプルを作ってみたいと思います。
まずはnodeで簡単な文字列を送信して、androidで表示させてみようと思います。
node側
今回はexpressを使いたいと思います。予めインストールしておいてください。
以下のコードで起動しておきます。
var app = require("express")();
var bodyParser = require('body-parser');
app.use(bodyParser.json());
app.use(bodyParser.urlencoded({
  extended: true
}));

app.get("/", function(req, res){
    res.send("Hello world");
});

app.listen(3000);
一回テストしてみます。
[
android側
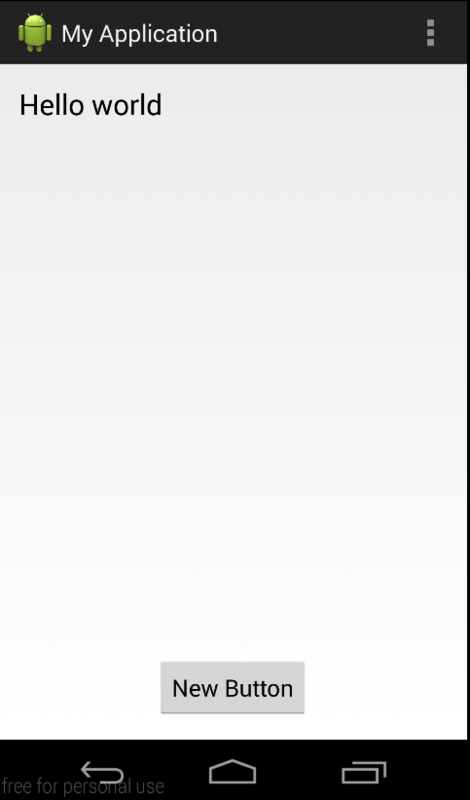
レイアウトはすごく簡単に

ボタンを押したら、TextViewの文字が変わるようにします。
ではソースの方を
public class MyActivity extends Activity {

    private TextView textView;

    @Override
    protected void onCreate(Bundle savedInstanceState) {
        super.onCreate(savedInstanceState);
        setContentView(R.layout.activity_my);

        textView = (TextView)findViewById(R.id.textView);
        Button btn = (Button)findViewById(R.id.button);

        btn.setOnClickListener(new View.OnClickListener() {
            public void onClick(View view) {
                AsyncGetStringTask task = new AsyncGetStringTask(textView);
                task.execute();
            }
        });
    }

    .......
    .......
    .......

    class AsyncGetStringTask extends AsyncTask<String , String, String> {
        private TextView textView;

        AsyncGetStringTask(TextView textView){
            this.textView = textView;
        }
        @Override
        protected String doInBackground(String... strings) {

            try{
                HttpGet httpGet = new HttpGet("/*nodeの場所*/");

                DefaultHttpClient client = new DefaultHttpClient();

                HttpResponse httpResponse = client.execute(httpGet);

                //int statusCode = httpResponse.getStatusLine().getStatusCode();

                HttpEntity entity = httpResponse.getEntity();

                String response = EntityUtils.toString(entity);

                entity.consumeContent();
                client.getConnectionManager().shutdown();

                return  response;

            }catch (ClientProtocolException e) {
                e.printStackTrace();
            } catch (IOException e) {
                e.printStackTrace();
            }

            return null;
        };
        @Override
        protected void onPostExecute(String response){
            textView.setText(response);
        }
    }
}
ポイントは、UIスレッドでHTTP通信しようとすると怒られるので、マルチタスクで通信してるところです。
doInBackgroundでバックグラウンドで処理してる時にUIをいじろうとすると、これまたUIスレッドじゃないのにUIいじろうとするなって怒られるので、
いじるなら基本的にはonPostExecute内で。
どうしても使いたいならhttp://developer.android.com/reference/android/os/Handler.html
実行ー


とれてますね
文字を変えてみましょう。
app.get("/", function(req, res){
    res.send("AAAAAAAAAA");
});

文字じゃなくてjson使うときは
app.get("/", function(req, res){
    res.json({name: "hoge", age: "98"});
});
.....
.....
class AsyncGetStringTask extends AsyncTask<String , String, String> {
        ......
        ......
        @Override
        protected void onPostExecute(String response){
            JSONObject jsonObject = new JSONObject(response);
            String name = jsonObject.getString("name");
            String age = jsonObject.getString("age");
        }
みたいにやればOK
sshの設定で
@@@@@@@@@@@@@@@@@@@@@@@@@@@@@@@@@@@@@@@@@@@@@@@@@@@@@@@@@@@
@         WARNING: UNPROTECTED PRIVATE KEY FILE!          @
@@@@@@@@@@@@@@@@@@@@@@@@@@@@@@@@@@@@@@@@@@@@@@@@@@@@@@@@@@@
Permissions 0640 for '/Users/koya/.ssh/konoha01.key' are too open.
It is required that your private key files are NOT accessible by others.
This private key will be ignored.
bad permissions: ignore key: /Users/koya/.ssh/konoha01.key
Permission denied (publickey,keyboard-interactive).
.ssh/configで指定したキーのパーミッションがおかしいみたいです。
chmod 400 ~/キーの場所
で解決〜
Connection to http://localhost:3000 refused って言われる
http://blog.ceed.jp/?p=298
AVDのlocalhostとは自分自身を指すらしい
特別に 10.0.2.2 がローカルマシンを指すように割り当てられている
String url = "http://10.0.2.2:3000";
//String url = "http://localhost:3000";
HttpPost post = new HttpPost(url);
androidで一意なハッシュ生成
ハッシュを生成するにはApacheCommonsLangライブラリを使います。
ApacheCommonsLangライブラリ導入
build.gradleのdependenciesに
compile 'commons-lang:commons-lang:+'
を追記
そしてSync
使い方
//アルファベットと数字
RandomStringUtils.randomAlphanumeric(int count);
//アスキー文字
RandomStringUtils.randomAscii(int count);
//アルファベット
RandomStringUtils.randomAlphabetic(int count);
//数値
RandomStringUtils.randomNumeric(int count);
countには欲しいhashの文字数を入れます。
android ギャラリーから画像選択
http://furudate.hatenablog.com/entry/2013/06/01/064115
を参考にさせてもらい
//画像選択ボタンイベント
    private View.OnClickListener clicked_image_select = new View.OnClickListener() {
        public void onClick(View v) {
            pickFilenameFromGallery();
        }
    };

    //clicked_image_selectが呼び出された時に実行される
    private void pickFilenameFromGallery() {
        Intent i = new Intent();
        i.setType("image/*"); // 画像のみが表示されるようにフィルターをかける
        i.setAction(Intent.ACTION_GET_CONTENT); // 出0他を取得するアプリをすべて開く
        startActivityForResult(i, REQUEST_CODE_GALLERY);
    }

    @Override
    protected void onActivityResult(
            int requestCode,
            int resultCode,
            Intent data) {


        if (resultCode == RESULT_OK) {
            try {
                ContentResolver cr = getContentResolver();
                String[] columns = {MediaStore.Images.Media.DATA};
                Cursor c = cr.query(data.getData(), columns, null, null, null);
                c.moveToFirst();
                bitmapUri = Uri.fromFile(new File(c.getString(0)));
            } catch (Exception e) {
                e.printStackTrace();
            }
        }
    }
android 下部にレイアウトを固定する
http://tech-gym.com/2013/03/android/1173.html
のようにandroid:layout_weight="1"を追加しても固定されなかった。
なので
android:layout_alignParentBottom="true"
を追加したら行った。
固定するレイアウトの高さに注意(wrap_content)